
 Valentine’s Day is a fun day for kids, and we have some crafting ideas that can help your little ones have a great time. Make a special box to collect and keep Valentine’s Day cards from family, friends and classmates.
- “Monster” boxes. We found this great project on the Giggles Galore When it comes to collecting and storing all those Valentines, not just any old box will do. This adorable project starts with a standard rectangular facial tissue box and transforms it into a (sort of scary) monster who “eats” the Valentine cards. Using sturdy red, white, or brown kraft wrapping paper means you can effectively cover any decorated tissue box, giving your budding artist a blank slate to decorate with markers, crayons, or heart stickers.
- Toilet paper tube love bugs. Using something we all have around the house, these adorable toilet paper roll love bugs are quick and easy, and will bring smiles to faces young and old. Thanks to Red Ted Art for this sweet idea. With some googly eyes, pipe cleaners, red kraft paper, a few beads, and some tacky craft glue, these love bugs quickly come to life. Cover the tube in white or red kraft paper, glue on some googly eyes, fashion legs from pipe cleaners with a bead on each end, cut heart-shaped wings and antennae out of more kraft paper, and decorate at will with more hearts, stickers, glitter, whatever your heart desires. Make a family by cutting a paper towel roll in half to make a taller “parent” love bug, or cutting down a toilet paper tube to make a “baby” love bug.
- Valentine’s Day pencils. Thanks to The Gunny Sack for this simple and cute craft project using just pencils and pipe cleaners. With a pack of personalized pencils, you can put “From Susie” (insert your child’s name) or even “Happy Valentine’s Day” on each pencil. Then simply twist some red pipe cleaners into heart or spiral shapes and attach to the eraser end of the pencil with a dollop of hot glue. Now you’ve got a pretty and practical Valentine’s Day gift everyone can use. Add some adorable notepads for a perfect Valentine package.
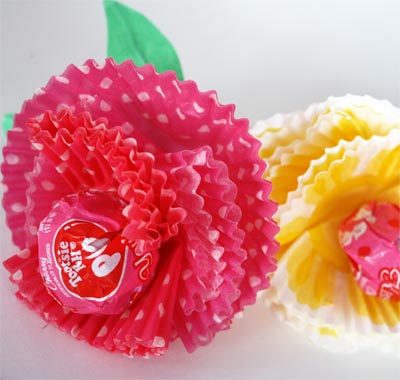 Valentine’s candy bouquet. This sweet treat idea comes to us from the brilliant folks at Skip to my Lou. All you need is your favorite brand of lollipops, some paper cupcake liners, floral wire, and green masking tape. Simply punch a hole in the paper liners, drop a lollipop through the hole, and wrap the green “leaves” around the lollipop stick underneath the paper liners. Making the leaves is done by placing a piece of floral wire between two strips of green masking tape and trimming it into a leaf shape.
- Sweetheart shortbread cookies. Diamonds for Dessert offers up this cute idea for colorful Valentine’s Day cookies. Baking with your kids is always an enjoyable craft! Inspired by the candy conversation hearts we all know and love, these cute, puffy little heart-shaped shortbread cookies can be bagged up for sharing in resealable Valentine Treat Bags. When you want a cookie that’s delicious but not overly sweet, these little darlings fill the bill nicely.
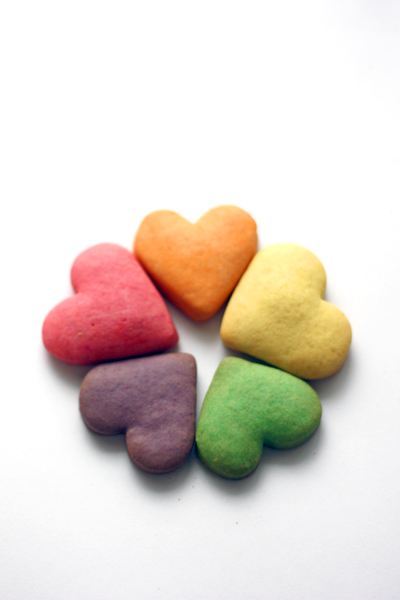
Here’s the recipe from Diamonds for Dessert:
Ingredients:
- 3 cups flour
- 1/2 cup cornstarch
- 1/4 tsp salt
- 1/2 tsp baking powder
- 1/2 tsp baking soda
- 1 stick (8 tbsp) butter, at room temperature
- 1 cup sugar
- 1 large egg
- 2/3 cup fat-free milk
- Natural food coloring
Directions:
- Cream butter and sugar together, and mix in the egg. In another bowl, combine the dry ingredients. Pour half of the dry mix into your butter/sugar/egg mixture and combine. Mix in the milk and add in the remaining half of the dry ingredients.
- For colored hearts, divide the dough into five equal pieces. Add two drops of food coloring and knead into one piece of dough. Repeat with the other dough pieces using different food colorings. Wrap each piece of dough in plastic wrap and chill for 1 hour.
- Preheat the oven to 325ºF. Sandwich one piece of dough between two pieces of plastic wrap on a flat surface, or place on a flat, floured surface. Roll dough out to 1/8 inch thick and cut with a heart-shaped cookie cutter. Place cut-outs on parchment-lined cookie sheets.
- Bake each sheet for 15 minutes. Then cover each sheet with a piece of aluminum foil (to preserve the colors) and bake for 10 more minutes. Let cool on the tray. If the cookies still aren’t crunchy after cooled, place back in the oven, still covered by the foil, and bake for 5-10 more minutes and then let cool again. Feel free to skip the 2nd baking step if you’d prefer softer cookies.
*If you want flatter cookies (less baking time is needed for flatter cookies), either poke each cookie with a fork so that the cookies are covered with holes, or roll the dough thinner, 1/16 inch thick. Then, bake each sheet for 15 minutes and let cool. If still not crunchy, replace in the oven for 5-10 more minutes, covered in foil. Makes approximately 50 large cookies or 75 small cookies.


